Picture
I have watched Master chef and drooled over the delicious culinary masterpieces they have created. Who hasn't? But let me take a moment to set you all straight. I enjoy the eating part, not the cooking. I know some people actually enjoy cooking, others  find it quite meditative,  I'm just not one of them. If I could have a chef drop around each day to prepare dinner I would be one very happy little woman.

So when someone like Adriano Zumbo comes onto a show like Master chef to hawk his latest product (oh, alright to demonstrate and pass on his skills) I am left wondering where I can go to eat said creation. It has never, ever, crossed my mind to create one of these edible works of art myself. I might add that visiting one of Adriano Zumbo's shops in Sydney has been on my to do list for a little while now and I hope to achieve it early in the new year (a girls gotta have a goal). 

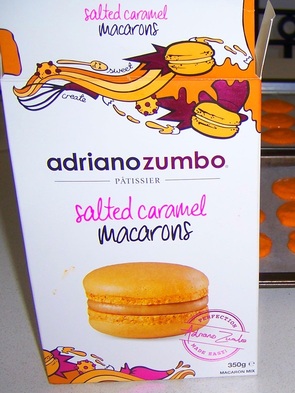
In the meantime, I came across the Adriano Zumbo kits now available at supermarkets and went into overdrive. I mean, it's in a kit ... how hard can it be? So off I headed to the supermarket to purchase my Adriano Zumbo goodness and they had run out but a few days later I had some success. So I purchased the kit, it was $7.80 which is a lot for a packet "cake" but I really wanted to give it a whirl.

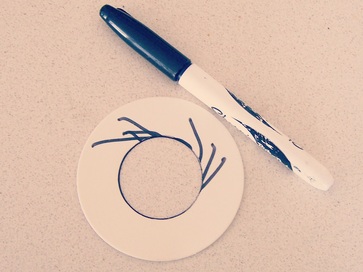
The kit comes with everything you need to create the delectable macarons include a circle stencil to make a template so you can create even sized macarons. You can also print the finished template out from his online site but since I had a nine year old lingering around waiting to be involved in the eating part of the macaron process, I put him to work.

Two piping bags were included in the kit. One for the shells and one for the creamy, salty caramel filling. They were easy to use and I was happy with the whole process.
Picture
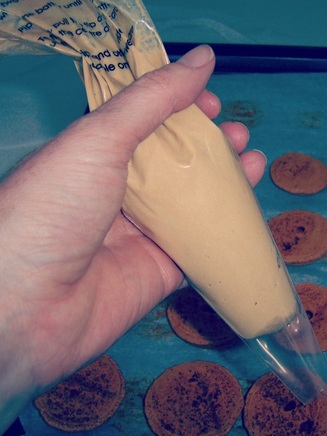
This was the piping bag for the filling. Just in case you were wondering why there are some little cooked macarons in the background.
Picture
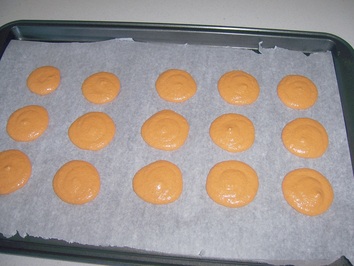
Piped and sitting for a moment, ready to go into the oven.
Picture
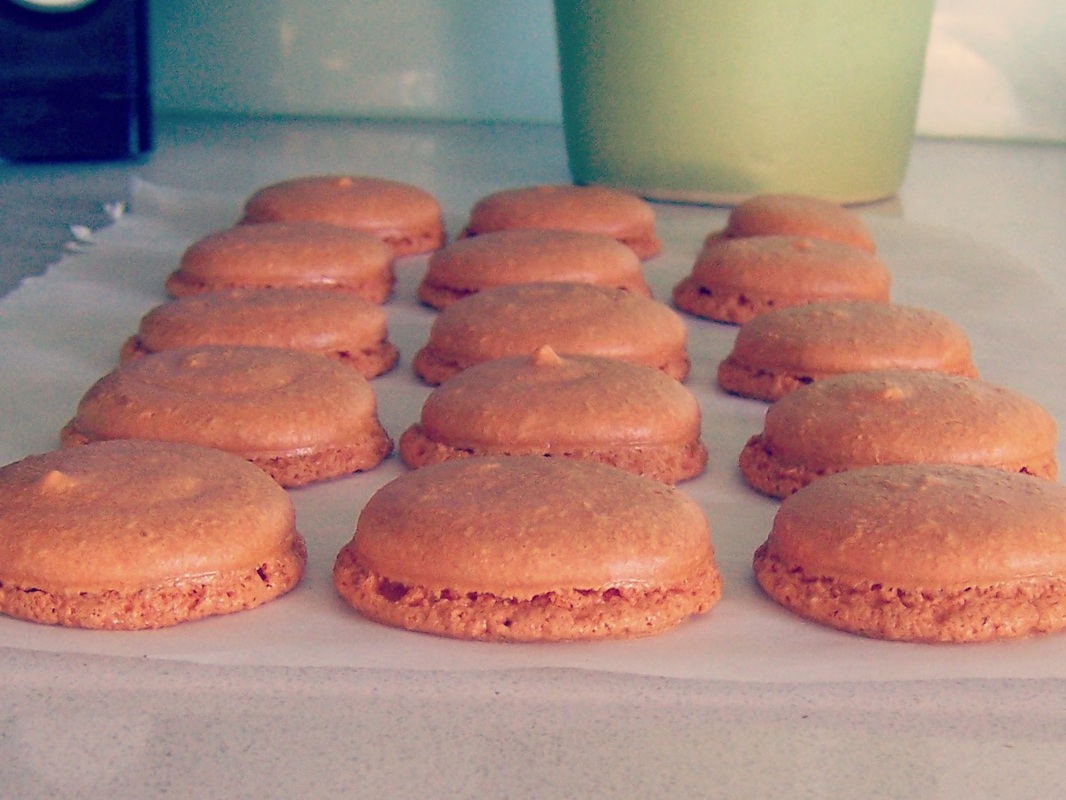
Sitting and waiting for them to cool having just come out of the oven. I was really happy with the results.
Picture
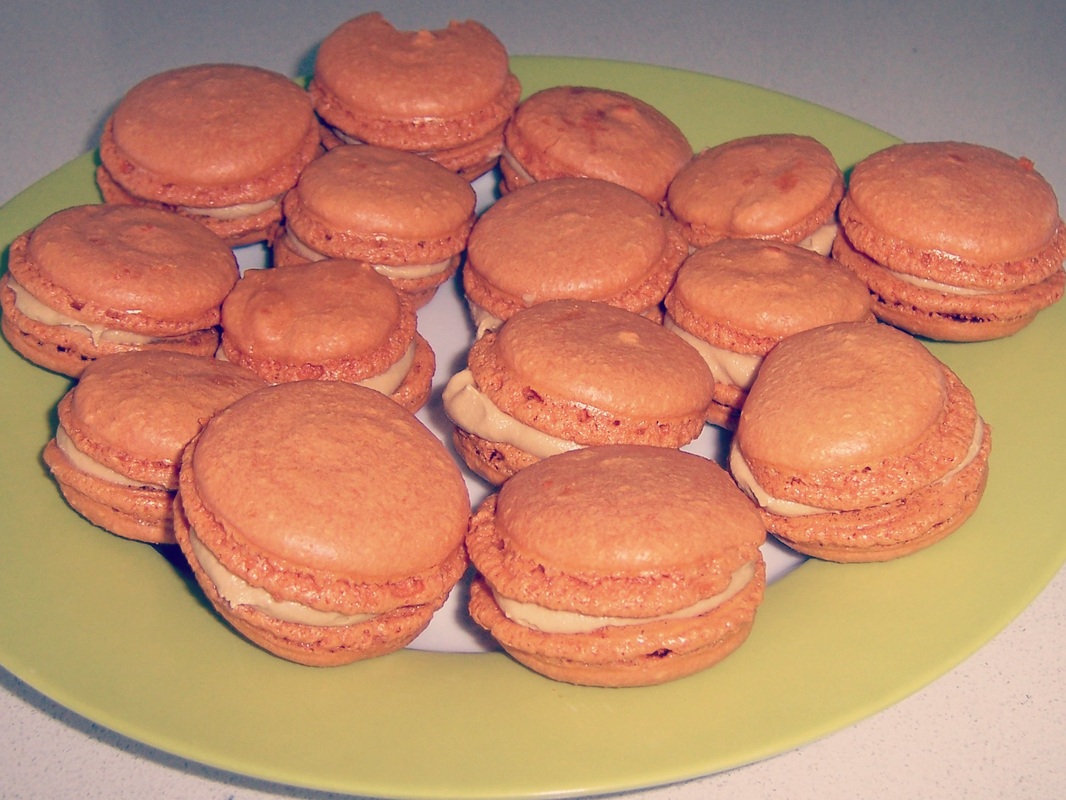
I'm no Adriano Zumbo but I was pleased with the look of these! We even managed to have a few left over and they were just as tasty the next day.


Using this type of kit was much more labour intensive than a regular chocolate cake packet mix but after a little trial and error with this first batch I was really happy with the results and even though the price was higher it was still cheaper than having someone else make me a batch of macarons.

The end result. They were absolutely delicious, they were a hit with everyone and I would definitely make them again.

Cheers,

Lee
 
Picture
The outdoor garden area at Sugardough.
Here we are again and it's Monday already. The weekend always seems to pass so quickly and it's nice to not have to race kids from school pick up to after school activities. The weekend is our families chance to take a breather and try a few new things out. 

So here's the thing. Everyone that knows me well (oh, alright even people I don't know that well) know that I love cake. I mean what's not to like!!?? Don't answer that.... it was rhetorical anyway. I have my favourite places but I have also been known to drive across town to try a new one out. So when I read an article a few weeks ago in the Sunday paper about the top 5 cakes places in Melbourne, my first thought was .... What!! I've only been to one of these places, how can that possibly be? My second thought was, Challenge accepted!!

So after spending the morning organising everyone else's breakfasts, getting them dressed, packing bags with the multitude of things you have to take with you "just in case" when you are out and about with a toddler and a little bit of kid (and husband) wrangling and we were in the car on our way to Sugardough, Panificio Patisserie. It's located at 163 Lygon Street in Brunswick East (just in case you would like to pay them a visit yourself).

Once we finally arrived at our sweet destination we found that there was not a seat to be had. While our 9 year old and his toddler brother pressed their faces against the glass it was  hard to even see the cakes let alone move around the cafe, I've been in ensuites that were bigger. But, having said that once we did get a look at the cakes, they were amazing. The kids of course, picked their usual cupcakes - I don't think they even noticed anything else. I picked a couple of yummy treats to take home; a three layered vanilla cake and a chocolate brulee. We found a couple of seats outside for the kids to eat their cupcakes. You know, because there was no way they were going to last until we got home and when the kids were almost done, we realised there was a lovely little garden seating area out the back. Oh well, next time.

Picture
My photo's really don't do these justice - but due to the difficult nature of food photogra.....oh, alright. I ate them.
Now even though this was an outing for cake we decided to stop in and visit a little deli on Lygon St which we had seen featured on Getaway and it was so worth the visit!! More cake which was of course, delightful. But the real reason we went there was the cheese. La Parisienne Pates is located at 290 Lygon St, Carlton and they had the most amazing selection of cheese and cold meats. I had to try the cheese which was shown on the episode of Getaway which made me want to go and visit in the first place.  You heat up the cheese in the little container it comes in and then dip crusty bread straight into it. Yum!
Picture
The cheese comes like this.
Picture
It's making my mouth water just looking at it.
I ended up taking a small portion of the cheese and putting it into a ramekin to heat up and eat. (You can only eat so much cheese in one sitting!)
Picture
The cheese ready for dipping with the crusty baguette. Yum.


I love a lazy Sunday where you can just wander around with the family and try out a few new tasty treats. So we took our booty home and had a crusty baguette with cheese and olive salami for lunch with beautiful cakes for desert. It was like the best day ever!!

Hope the weekend with your family was just as nice.

Cheers,

Lee
 
For those of you who have never been to Melbourne (and even those of you who live here but don’t get out much) I have a treat for you today. I am going to take you on a visual tour of some of my favourite spots in Melbourne. 

Melbourne has to be one of the most people friendly cities in the world and there are lots of things to see and do but today I have focused on just a few. Enjoy.

You may notice from looking at the map that I only covered a really really small part of Melbourne on today's visual tour but there is just so much to take in I didn't want to overwhelm you on our first day out!!

If you have enjoyed the images please let me know and if you would prefer them as still images instead of a slide show let me know that too!! Next time, I think we will look at some more kid friendly places to go.

Cheers,

Lee
 
Now I know this is a little from left field - I mean so far I have talked about my love of cake but not actually shared any recipes and all the talk with sugar at the moment is more about quitting it rather than embracing it.  Yeah, I know .... I'm a rebel. So you probably didn't see this coming but ... life's like that.

Using the cinnamon spice I bought as part of my  Coles Circle booty I  wanted to put together some simple recipes for lunchbox treats.

Today's treat are Apple turnovers. These keep really well in an air tight container for three to five days, so you could make them when you have some time on a Sunday and have lunchbox treats for the whole week.
1. Peal 4 to 5 medium size apples, core them and cut into slices. I used delicious apples. Put them into a pot on medium heat with a little water (so they don't stick) add some cinnamon sugar to make them nice and sweet. Cook them until they are soft but before they go mushy.

2. While the apples are stewing defrost two sheets of puff pastry and then cut into four even pieces.

3. Separate the four pieces of puff pastry and leave a little bit of space on the tray to work with.
4. Let the apples cool down a little bit so they don't make the pastry soggy. Then put pieces of the apple onto one half of a pastry square.
5. Fold the other half over to form a triangle and seal it shut with your fingers by pressing.
6. Push down around the two joined edges with a fork to make them look a little bit fancy.
7. Place all the triangles onto a baking tray with cooking paper (so they don't stick to the tray) and brush the top of each piece with milk and then sprinkle a little bit of cinnamon sugar on top.
8. Bake in a moderate oven for around 10 to 15 minutes. Keep an eye on them. You will know they are ready when they are puffed up and golden brown.
9. Two puff pastry sheets make enough for 8 tasty apple turnovers. They are really nice warm with ice cream or even cold the next day in lunchboxes. If you love sugar (and who doesn't!!) you could also top them with a little icing once they are cooled down.

This is a really easy cooking project you could even get the kids involved with.  

Enjoy,

Lee
 
Hey there Groovy Chicks,

I hope that you have had a great week.... and if not it's almost the weekend, so perhaps next week can be a do-over. I know as a stay at home mum that not having a regular "working" day or even working week can mean that days often blend into each other. I know myself I have forgotten what day it was a number of times this week. So I have put together a few lovely things to inspire, motivate or perhaps just make you smile.

Lunch Box Inspirations and Pretty Tasty Things

Picture
Timbuktu Magazine
Picture
Picture from design-dautore.com
I don't know that I have the time or energy to actually make either of these "dishes" but I
thought they were great anyway. Lunch box inspiration never goes astray. If you
have a go yourself I would LOVE to see it! And that cake looked so beautiful -
what can I say.... I love a good cake.

Crafty Stuff to do with the Kids

Picture
from www.smallhandsbigart.com
I really love this idea. Very simple but lots of fun!! There are a few options for making these. You could have some dress up fun first (each child needs four different outfits - so you have a picture for each side) or you could just use magazine pictures. Either way it would be fun. You can get the kids involved in the cutting and gluing and then the actual fun of mixing and matching the bodies. I know kids love doing stuff which is all about them, so having pictures of your kids to do this with would only add to the entertainment value. Instructions are at http://smallhandsbigart.com/blog/featured-article/mix-match-dolls/  if you want to see how they did it and learn from their mistakes. Awesome idea!

The winner of ........ I wish I was there right now.

Picture
Italy in the summer picture from design-dautore.com
I included this picture because it has been so very cold in Melbourne lately and I really wanted to be there in the warm... and it looked so very beautiful.

Websites to Check Out

OK, lastly I know I have already brought up www.picmonkey.com before but if you have not had a little play with it already you are really missing out. So I have decided to include (with her permission, of course!) a before and after example from someone I have converted to a lover of picmonkey. No, I am not on commission... I just love what you can do with it!!
Picture
Before picmonkey
Picture
After picmonkey.
I told you it was impressive!!
Anyhoo, I am hoping you have enjoyed today's joylights. These really are a few of the things that have brought me some joy this week or just amused me.  

Have a wonderful weekend.

Cheers,

Lee

PS Sending a big warm fuzzy hug and I hope you feel better real soon to my BFF Daniela, who is not doing so well this week.