In my very last post I let you in on a little secret, something to help you shift that bulge forming around your middle (well, mostly my middle - but surely, I cannot be alone!). So you got my tip hot off the presses... and I am wondering how many of you have actually tried it out?
Cinnamon tablets. So how many of you complaining about weight around your middle, actually got out there and gave it a try? Just in case you were contemplating it but are still yet to give it a go I have some more motivating facts to share with you. I headed back to see my naturopath just this morning and he got out the trusty tape measure (Hands up if you like getting out the tape measure - said no-one, ever) to track my progress. It turns out I have lost a total of 8cm off my waist since starting on the cinnamon tablets - if these things don't get your metabolism going, I don't know what does!! Yay me!
Now, let me say that I am not a big person to start with but I was getting quite depressed with this mass forming around my middle, so I am thrilled to have been able to shift it. I cannot say like actresses often do, "Oh, I just look like this, I eat whatever I want!" because that would be lying, there have been other things at play besides the cinnamon tablets but I've got to add the tablets did give me the kick start.
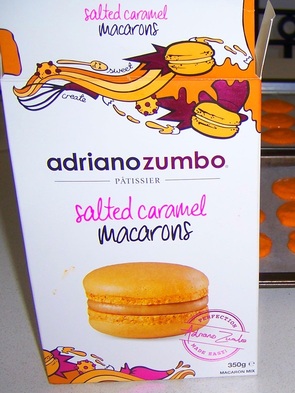
I have been dabbling in the world of quitting sugar. Not cold turkey, mind you especially over Easter (I'm not crazy!) but I have made a number of changes and I wanted to share them. I have also been experimenting with sugar free recipes with the kids. I can honestly say, up to this point I have not been overly successful but I shall push on.
Over the next few posts I will be sharing with you some of my recipe triumphs and fails and also my continued search for the ultimate sugar free, easy to carry, kid friendly, not full of artificial crap, put in your lunch box snack.
Today I give you, Kale Chips. You are probably pulling the same face my husband pulled when I said we were giving them a go, but save your nasty comments until after you have tried it cause they were very tasty! Both the kids and the husband enjoyed them as did I and they were delicious.
They are very quick and easy to make, here is how.
Pre-heat the oven at 180 degrees
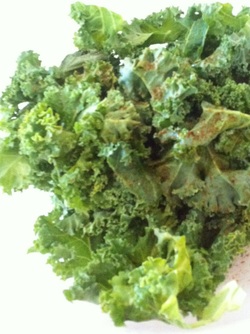
Start with a bunch of Kale (looks kinda like spinach), rip the leaves away from the stalks (don't eat the stalks - they are bitter)
Then rip the leaves up into chip size pieces. Wash them and dry them off. Put them in a big bowl with a little bit of oil and some salt or spices (whatever you like) and toss it through with your hands.
Lay the leaves out on a baking tray lined with baking paper put them in the oven for about 5 minutes (keep an eye on them) until crisp.
Let them cool a minute and then toss them into a big bowl and enjoy them.
They have a very salty flavour already so don't go too crazy on the salt. Kale is supposed to be a super food - very good for you. I really enjoyed them. I hope you do too.
Cheers,
Lee
Cinnamon tablets. So how many of you complaining about weight around your middle, actually got out there and gave it a try? Just in case you were contemplating it but are still yet to give it a go I have some more motivating facts to share with you. I headed back to see my naturopath just this morning and he got out the trusty tape measure (Hands up if you like getting out the tape measure - said no-one, ever) to track my progress. It turns out I have lost a total of 8cm off my waist since starting on the cinnamon tablets - if these things don't get your metabolism going, I don't know what does!! Yay me!
Now, let me say that I am not a big person to start with but I was getting quite depressed with this mass forming around my middle, so I am thrilled to have been able to shift it. I cannot say like actresses often do, "Oh, I just look like this, I eat whatever I want!" because that would be lying, there have been other things at play besides the cinnamon tablets but I've got to add the tablets did give me the kick start.
I have been dabbling in the world of quitting sugar. Not cold turkey, mind you especially over Easter (I'm not crazy!) but I have made a number of changes and I wanted to share them. I have also been experimenting with sugar free recipes with the kids. I can honestly say, up to this point I have not been overly successful but I shall push on.
Over the next few posts I will be sharing with you some of my recipe triumphs and fails and also my continued search for the ultimate sugar free, easy to carry, kid friendly, not full of artificial crap, put in your lunch box snack.
Today I give you, Kale Chips. You are probably pulling the same face my husband pulled when I said we were giving them a go, but save your nasty comments until after you have tried it cause they were very tasty! Both the kids and the husband enjoyed them as did I and they were delicious.
They are very quick and easy to make, here is how.
Pre-heat the oven at 180 degrees
Start with a bunch of Kale (looks kinda like spinach), rip the leaves away from the stalks (don't eat the stalks - they are bitter)
Then rip the leaves up into chip size pieces. Wash them and dry them off. Put them in a big bowl with a little bit of oil and some salt or spices (whatever you like) and toss it through with your hands.
Lay the leaves out on a baking tray lined with baking paper put them in the oven for about 5 minutes (keep an eye on them) until crisp.
Let them cool a minute and then toss them into a big bowl and enjoy them.
They have a very salty flavour already so don't go too crazy on the salt. Kale is supposed to be a super food - very good for you. I really enjoyed them. I hope you do too.
Cheers,
Lee


 RSS Feed